Agile Software Development Company

Blogs Agile Software Development Because technology keeps changing so fast, flexibility and speed are key. Software tools for businesses should be able to adjust to new situations, give quicker outcomes and stay of the highest quality. That is why Agile software companies are called on to help. Agile methodologies allow us to help companies design software that scales well, focuses on users and runs smoothly, with software delivered to the market quickly and regularly improved. What is Agile Software Development? Agile software development uses a process that encourages working together, going through steps several times and being flexible. Rather than taking months to create a finished product, Agile teams place their focus on delivering working software at least once every 2-4 weeks and use review, suggestions and adjustments throughout the process. What Does an Agile Software Development Company Do? An Agile software company creates, checks and manages software systems using Scrum, Kanban or SAFE frameworks. The industry consists of companies that provide: Agile project management is useful Roles within a Scrum team come from different fields Swift prototyping and the creation of an MVP The use of CI/CD practices Frequent interaction between companies and their stakeholders Frequently updated additions Benefits of Choosing an Agile Software Development Company Faster Time to Market : Introducing updates more often lets you get your product on the market fast. Better Transparency : Thanks to daily meetings, reviews and shared information, clients and stakeholders can follow progress. Continuous Improvement : Agile keeps evolving by changing its plan based on feedback and ongoing changes—the product never stays the same. Focused on Business Value : Tasks are ordered by how much benefit they bring to the business, not only based on their complexity. Strong Collaboration : The agile method promotes strong teamwork between developers, testers, designers and clients. Agile Frameworks We Use Framework Key Features Scrum Time-boxed sprints, daily stand-ups, sprint reviews Kanban Continuous flow of work, visual boards, cycle time optimization SAFE (Scaled Agile Framework) Designed for enterprise-level Agile development Lean Software Development Focus on eliminating waste and maximizing value Our Agile Software Development Process Requirement Discovery :We start by figuring out what users want, what the company hopes to achieve and create our backlog for development. Sprint Planning : We look at all the features and put them into user stories before defining how much work we will do in each sprint. Development & Testing : The teams combined work and test the software by repeating short development and testing cycles. Review & Feedback : Each sprint is finished by having a demo and asking for stakeholder feedback. Continuous Delivery : We finish each sprint by delivering functional software through our CI/CD system. Iteration & Scale : We adapt the product as we get feedback and, if necessary, apply Agile practices to more teams. Industries We Serve FinTech Healthcare The retail & eCommerce industry EdTech The world of Travel & Logistics Enterprise SaaS Real Estate Insurance Why Partner with Us for Agile Development Feature What You Get Rapid Prototyping Get your MVP ready in weeks, not months Experienced Agile Teams Certified Scrum Masters, Product Owners, and Agile developers Transparent Communication Sprint reviews, burndown charts, and project dashboards Change-Friendly We embrace changing priorities and pivot fast Global Delivery Model Onshore, offshore, and hybrid team models available Agile Tools & Technologies We Use Project Management: Jira, Trello, Asana and ClickUp are all project management tools. CI/CD: CI/CD tools include Jenkins, GitHub Actions, GitLab CI and CircleCI. Version Control: Version Control is handled by using Git and Bitbucket. Collaboration: For collaboration, we use Slack, Zoom and Confluence. Frontend: For the frontend, we use React, Angular and Vue.js. Backend: The backend uses Node.js, .NET, Java, Python and PHP. Other Blogs Third-Party API Integration Third-Party API Integration Fintech App Development Fintech App Development Magento Website Development Magento Website Development HTML5 Web Development HTML5 Web Development React Native App Development React Native App Development Flutter App Development Flutter App Development iOS and Android App Development iOS and Android App Development ReactJS Web Development ReactJS Web Development E-commerce Website Development E-commerce Website Development Full-Stack Web Development Full-Stack Web Development Static or Dynamic Website Static or Dynamic Website Custom Website Development Custom Website Development UI/UX Design Company UI/UX Design Company Shopify for E-Commerce Development Shopify for E-Commerce Development Angular Development Services Angular Development Services Node.js Development Node.js Development Laravel Development Services Laravel Development Services PHP Development Services PHP Development Services Backend Development Company Backend Development Company Front-End Development Front-End Development Best Software Development Company Best Software Development Company SaaS Development SaaS Development Enterprise Software Solutions Enterprise Software Solutions Web Development Company Web Development Company Mobile App Development Mobile App Development Software Development Software Development Custom Software Development Custom Software Development Custom Middleware in Laravel Custom Middleware in Laravel Laravel Echo Server Laravel Echo Server API Documentation API Documentation Web Development Web Development SEO Development SEO Development Mobile Development Mobile Development Google Webmaster Google Webmaster Payment Gateway Integration Payment Gateway Integration Google AdWords Google AdWords Share: Facebook Twitter Linkedin Instagram Frequently Asked Questions What is Agile software development? Agile software development is a methodology that emphasizes iterative development, collaboration, customer feedback, and rapid delivery. It breaks projects into small, manageable units called iterations or sprints, allowing teams to adapt quickly to changes and deliver value continuously. How is Agile different from the traditional Waterfall model? Unlike the Waterfall model, which follows a linear and sequential approach, Agile is flexible and iterative. Agile allows changes to requirements even late in the development process, whereas Waterfall requires all requirements to be defined upfront. Agile encourages continuous feedback and improvement, while Waterfall sticks to a fixed plan. What are some popular Agile frameworks? Scrum – focuses on roles, sprints, and ceremonies. Kanban – emphasizes visual workflow and continuous delivery. Extreme Programming (XP) – focuses on technical excellence and frequent releases. SAFe (Scaled Agile Framework) – used to scale Agile across large organizations. What roles exist in an Agile team? Product Owner – defines and prioritizes
Third-Party API Integration
Blogs Third-Party API Integration What is Third-Party API Integration? Third-party API integration means your web application links to a provider’s API to benefit from their data or features. So, you won’t build the feature yourself but use an existing service instead. Why Use Third-Party API Integration in Web Apps? Faster Development :APIs make development faster by delivering functionalities that can be used straight away. Cost-Effective :Employing people to build advanced functions like payments, shipping or CRM increases costs rapidly for most companies. APIs give you more cost-effective options. Reliability & Security :Popular third-party APIs from Google and others offer security, strong infrastructure and the ability to scale. Seamless User Experience :National eIDV APIs provide for real-time actions by offering the ability to log in using social media, look up up-to-date weather and send OTP codes at the time of need. Easy Maintenance & Updates : The provider manages updates to the third-party, so you don’t have to deal with them. Popular Use Cases of Third-Party API Integration in Web Apps Functionality API Examples Payment Processing Stripe, PayPal, Razorpay Maps & Geolocation Google Maps, Mapbox, HERE Maps Social Logins Facebook Login, Google Sign-In Email & SMS Services SendGrid, Twilio, Mailgun Analytics & Tracking Google Analytics, Hotjar, Mixpanel Chat & Messaging WhatsApp API, Intercom, Zendesk Cloud Storage AWS S3, Google Cloud Storage Authentication Auth0, Firebase Auth, Okta CRMs & ERPs Salesforce, Zoho, HubSpot Shipping & Logistics Shiprocket, EasyPost, FedEx API How Third-Party API Integration Works (Step-by-Step) Select the API :Choose the service that meets your requirements and gives you access to secure and clear APIs. Sign Up & Get API Keys :Create a user account and receive your API keys, tokens or OAuth credentials by registering on the provider’s site. Read the Documentation :Learn about Requests/Responses, Endpoints, Rate Limits and Error Codes using the Documentation. Set Up Authentication :For secure use, most APIs recommend OAuth2.0, Basic Auth or API key headers. Send Requests & Handle Responses : Use GET, POST, PUT, or DELETE HTTP methods to communicate with the API endpoints using tools like: fetch() or axios in JavaScript requests in Python cURL for testing Parse and Use Data : Once the response is JSON or XML, then you can use the data to display changing elements in your app or set off some logic. Error Handling & Logging :Include special checks to handle requests that fail, timed-out connection issues or strangely incorrect data. Security Considerations for Third-Party API Integration Use HTTPS to secure API traffic. Secure store API keys (never expose them to the frontend). Implement rate limiting and timeouts to prevent API abuse. Update dependencies routinely and watch for vulnerabilities. Implement fallbacks or graceful degradation in case the API does not work. Common Challenges in API Integration Challenge Solution Incomplete Documentation Choose well-documented APIs or contact support Rate Limits/Throttling Use caching and optimize calls Version Changes Track changelogs and test updates in staging Authentication Complexities Use SDKs or libraries provided by the API provider Downtime or API Failure Implement retry logic and fallback mechanisms Tools and Libraries for API Integration Platform Tools/Libraries JavaScript Axios, Fetch API, jQuery AJAX Python Requests, HTTPx, Flask-Restful PHP Guzzle, cURL Node.js Axios, node-fetch Postman For testing API requests Swagger For API documentation & testing Best Practices for Third-Party API Integration Use Environment Variables for API credentials storage Test in Sandbox/Dev Mode prior to production integration Monitor API usage and logs regularly Cache static API data to decrease load and increase speed Verify provider SLAs & constraints prior to integration When Should You Use Third-Party APIs? Situation Use Third-Party API Building a payment feature Yes Need real-time SMS/email notifications Yes Building your own analytics system Not necessary You need full control or customization Depends App has tight security/data requirements Carefully review Other Blogs Agile Software Development Agile Software Development Fintech App Development Fintech App Development Magento Website Development Magento Website Development HTML5 Web Development HTML5 Web Development React Native App Development React Native App Development Flutter App Development Flutter App Development iOS and Android App Development iOS and Android App Development ReactJS Web Development ReactJS Web Development E-commerce Website Development E-commerce Website Development Full-Stack Web Development Full-Stack Web Development Static or Dynamic Website Static or Dynamic Website Custom Website Development Custom Website Development UI/UX Design Company UI/UX Design Company Shopify for E-Commerce Development Shopify for E-Commerce Development Angular Development Services Angular Development Services Node.js Development Node.js Development Laravel Development Services Laravel Development Services PHP Development Services PHP Development Services Backend Development Company Backend Development Company Front-End Development Front-End Development Best Software Development Company Best Software Development Company SaaS Development SaaS Development Enterprise Software Solutions Enterprise Software Solutions Web Development Company Web Development Company Mobile App Development Mobile App Development Software Development Software Development Custom Software Development Custom Software Development Custom Middleware in Laravel Custom Middleware in Laravel Laravel Echo Server Laravel Echo Server API Documentation API Documentation Web Development Web Development SEO Development SEO Development Mobile Development Mobile Development Google Webmaster Google Webmaster Payment Gateway Integration Payment Gateway Integration Google AdWords Google AdWords Share: Facebook Twitter Linkedin Instagram Frequently Asked Questions What is third-party API integration? Third-party API integration involves connecting your application with external services or platforms (like payment gateways, CRMs, social media, etc.) using their provided Application Programming Interfaces (APIs) to enhance functionality without building everything from scratch. What are the benefits of using third-party APIs? Faster development by leveraging existing solutions Cost savings on development and maintenance Access to specialized features, like payment processing, maps, or AI tools Scalability through reliable external services Are third-party APIs secure to use? Most reputable third-party APIs follow strong security protocols such as OAuth 2.0, SSL encryption, and token-based authentication. However, it’s crucial to assess the API provider’s privacy policies, rate limits, and data handling practices before integration. What are common challenges in third-party API integration? Limited or outdated documentation API rate limits and usage restrictions Versioning issues or deprecations Error handling and dependency on third-party uptime Comprehensive Software Solutions Across Verticals Marketplace Education E-commerce data Logistics why shaktiwebsolution Innovation we involves taking creative approaches to solve
Fintech app development company

Blogs Fintech App Development Fintech app development companies help shift the banking and finance industry from conventional methods to ones that use technology to please customers. With a team of fintech experts on your side, the app for mobile banking, crypto wallet or P2P lending gets the full security and compliance needed for today and tomorrow. In this extensive guide, we will discuss what a fintech app development company is responsible for, the main features of fintech apps, why you should work with experts and the complete process of building them. What is a Fintech App Development Company? The main work of a Fintech app development company is to make applications that let users look after their money online. Both highly skilled in software and financial matters, these businesses produce apps that excel in many ways. Secure Scalable The solution follows mandates such as PCI-DSS and GDPR. Anyone can access and use the information. These applications are created for use in several sectors such as: Digital banking I am knowledgeable about investment and trading. The connection between blockchain and cryptocurrency Peer-to-peer lending Handling your own finances Technology that focuses on the insurance sector Payment gateways are used for processing digital payments, while digital wallets are for storing your digital money. Types of Fintech Apps We Develop Mobile Banking Apps Access to your account as things happen Making transfers and settling payments of bills Protected with biometric services Seeing your full transaction history and receiving alerts. Lending & Loan Management Apps P2P lending platforms Using credit information within Qubi EMI calculators help you know how much you’ll pay every month and tools for tracking your payments help you stay on top of things. Stock Trading & Investment Apps Current information on stock prices Portfolio management Banking using AI & robo-advisors eWallet & Payment Apps UPI/QR-based payments You can transfer funds or split fees with your roommate. Multi-currency wallets Crypto & Blockchain Apps Cryptocurrency exchanges Wallet development Smart contract integration Personal Finance Management Apps Budget tracking & savings goals Financial dashboards Expense categorization Key Features of a Fintech App A successful fintech application must offer features that combine usability, security, and compliance. Common features include: Feature Purpose User Authentication Secure login using OTP, biometrics, or 2FA KYC Verification Ensures user identity using Aadhaar, PAN, etc. Real-Time Notifications Alerts for transactions, balances, offers AI-Powered Insights Personalized recommendations & spending analysis Payment Integration Seamless transactions via UPI, cards, wallets, netbanking Data Encryption Ensures sensitive user data is protected Regulatory Compliance Adheres to financial regulations and data laws Analytics Dashboard Real-time metrics and user behavior tracking Why Choose a Specialized Fintech App Development Company? Industry Expertise : We know the workflows involved in finance, how users behave and the rules they must follow. This helps you lower your chances of facing problems with compliance. Robust Security : Since cybercrime continues to increase, our fintech apps are strongly protected by: SSL encryption Tokenization Data security from start to finish Scalable Architecture : All our solutions can be adjusted as you add more users to your platform, big or small. Agile Development Process : Development, testing and delivering code repeatedly and quickly. Cross-Platform Compatibility : Our apps are made for Android, iOS and hybrid devices, all with responsive user interfaces. Fintech App Development Process Discovery & Planning Requirement gathering Market analysis Choosing the right technology tools UPS begins by making a budget and a timeline for completing the project UI/UX Design Wireframes and user flows are both included in the UX design Interactive prototypes New, easy-to-use interfaces Development Back-end structures & data base modeling Such integrations include those with the banking, payment, KYC and other related sectors. Securely coding the frontend of an application Testing & QA Functional testing Security audits Compliance testing Deployment & Launch Getting my app on the App Store Hosting configuration Integrating into the cloud with DevOps technology Maintenance & Upgrades Bug fixing Performance monitoring Feature enhancements Technologies We Use Frontend: Programming languages used on the frontend are React Native, Flutter, Swift and Kotlin. Backend: Programming frameworks used on the backend are Node.js, Python (Django/Flask), Java and .NET Databases: Choose from PostgreSQL, MongoDB, MySQL or Firebase for your databases. Security: OAuth 2.0, JWT and AES Encryption are performed for better security. Cloud: Cloud services like AWS, Google Cloud and Azure APIs: API options include Razorpay, Stripe, Paytm, Plaid and Twilio Compliance & Security Standards We Follow Standards for protecting payment data are PCI-DSS. GDPR stands for General Data Protection Regulation (GDPR) (EU). ISO/IEC 27001 is the standard for managing information security. Having your environment ready for a SOC 2 Type II compliance check Industries We Serve Banks & NBFCs Banks that exist only in a digital format are called Neobanks. There are two types of professionals in financial services: stockbrokers and wealth managers. Firms focusing on insurance technologies Fintech startups You can keep your digital currencies safe by using both exchanges and wallets. Cost of Fintech App Development Factor Estimated Cost (USD) MVP for a Fintech App $10,000 – $30,000 Medium-complexity App $30,000 – $80,000 Enterprise-grade Solution $80,000 – $200,000+ Development Time 3 to 9 months Cost depends on app type, feature set, technology, and team location. Why Choose Us as Your Fintech App Development Partner? More than ten years of building Fintech software solutions The company has finished and delivered more than a hundred fintech projects internationally. Experience with digital banking, payments, insurance and crypto Regularly using agile development with sprints and demos Implementing security from the start of every step Support and maintenance are available at any time. Other Blogs Agile Software Development Agile Software Development Third-Party API Integration Third-Party API Integration Magento Website Development Magento Website Development HTML5 Web Development HTML5 Web Development React Native App Development React Native App Development Flutter App Development Flutter App Development iOS and Android App Development iOS and Android App Development ReactJS Web Development ReactJS Web Development E-commerce Website Development E-commerce Website Development Full-Stack Web Development Full-Stack Web Development Static
Magento Website Development
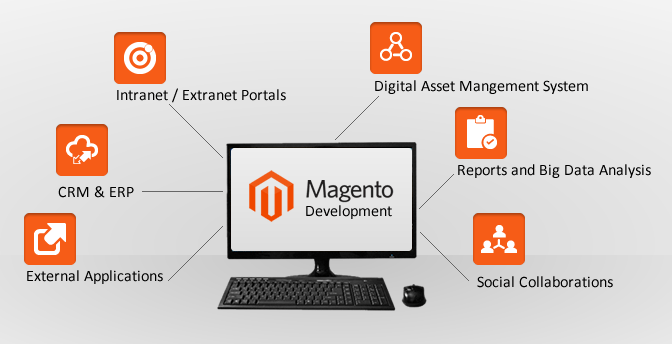
Blogs Magento Website Development A Magento website is a great way to make an eCommerce site that works well, is easy to customize and can handle many users. No matter if you’re a small startup or a large business, Magento allows you to create stores that fit your business best. We’ll look at the details of Magento, its features, benefits, how it’s used in development and why it is a leading choice for eCommerce. What is Magento? Magento is developed by Adobe and is a free online shopping system built in PHP. Using an online store tool, merchants can enjoy flexibility for their shopping cart and control the content, design and features of their website. The Voyage and Voyage Around the World are the major editions of the literature. Magento Open Source (Community Edition) – You can use it for free and it suits small and midsized businesses perfectly. Adobe Commerce, formerly known as Magento Commerce, is the paid version for business owners needing extra features, help and cloud solutions. Key Features of Magento Website Development Customizable and Scalable Design special strategies that fit your particular business. It works well for small shops as well as big business needs. Mobile-Friendly The responsive design included in the template makes your store look excellent on every device. Shopping is possible on your phone. Advanced SEO Features Using custom URLs, reviewing metadata and adding sitemaps among other things makes your site show better in search results. SEO is already supported from the beginning. Multi-Store Management Raise and run several stores from a single back office. Suitable for enterprises that have activities in more than one place, language or sell several products. Flexible Product Management Works with basic, configurable, packaged and digital types of products. Managing inventory and catalog is both powerful and easy to use. Secure and Reliable Updated security patches every so often. Secure online transactions are possible with PCI compliance support. Third-Party Integration You can easily connect with payment gateways (PayPal and Stripe) and popular CRMs and ERPs. Benefits of Magento Website Development High Performance : The platform remains fast and efficient when your store has a very large number of products. Extensive Community and Support : Because Magento has so many developers and supporters, you get a lot of help and advice whenever you face issues with your store. Personalized User Experience Customer segmentation Making offers based on demographics and custom prices Recommended products selected for each user Robust Analytics and Reporting : Use professional reporting tools to watch your customers, monitor sales and control your inventory. Magento Website Development Process Here’s a step-by-step breakdown of the Magento development lifecycle: Step 1: Requirement Analysis Identify what you want to achieve with your business, choose your products, define your audience and select which features you require. Choose which version of Magento suite you would like: the free open source or the paid Commerce edition. Step 2: Magento Installation and Configuration Get Magento running on your hosting server. Change store information, choosing the currency, preferred language and tax system. Step 3: Theme Design & Customization Magento has some fully prepared themes you can use or you can create one from scratch. Make certain the design can be accessed easily, speeds up the site and handles different devices. Step 4: Extension Integration Get and set up different extensions, including live chat, email marketing and SEO. Step 5: Custom Development (If Needed) Create or add on new modules depending on what your business requires. Make your site stand out with its own way of handling checkout, the types of products displayed or what the site administrator can do. Step 6: Payment & Shipping Setup Include payment gateways in your website, for example, PayPal and Stripe. Configure various shipping options, zones and the payment rates you want. Step 7: Testing & Quality Assurance Check if the website works correctly, fits with all devices and handles many users. Make sure your website responds quickly, is secure and can be used on any browser. Step 8: Launch Put your code into production by moving to your live server. Look for any problems after the application has been released. Step 9: Maintenance & Support Implement security patches and updates. Optimize performance and debug. Regular monitoring and backups. Magento Development Services You May Need When you hire a Magento development company or freelancer, there are useful services you can expect. Magento stores are built using website design and themes. Developing a Custom Module Changing from Shopify, WooCommerce, etc., to Magento API Services from External Partners Making Magento Run Faster Support & Maintenance for Magento Services deal with Magento SEO & Digital Marketing Magento vs Other eCommerce Platforms Feature Magento Shopify WooCommerce Customization Very High Moderate High Scalability Excellent Moderate Limited Hosting Self-hosted Hosted (SaaS) Self-hosted SEO Capabilities Advanced Good Moderate Ideal For Medium to Enterprise Small to Medium Bloggers & SMEs Who Should Use Magento? Magento is especially designed for: People who have big and expanding companies that want a personalized solution. Retailers with several stores aiming to control them all from one central point. Both B2B and B2C brands need custom pricing, catalogs and checkout flows. Organizations managing a lot of different products and complicated inventory. Cost of Magento Website Development The cost of building a Magento website depends on several factors: Factor Approx. Cost Range (USD) Magento Open Source Setup $0 (Free Platform) Hosting & Domain $10 – $100/month Theme Customization $500 – $5,000 Extension Integration $100 – $2,000+ Custom Development $2,000 – $20,000+ Magento Commerce License Starts at $22,000/year Note: Costs vary by project complexity, agency rates, and region. Other Blogs Agile Software Development Agile Software Development Third-Party API Integration Third-Party API Integration Fintech App Development Fintech App Development HTML5 Web Development HTML5 Web Development React Native App Development React Native App Development Flutter App Development Flutter App Development iOS and Android App Development iOS and Android App Development ReactJS Web Development ReactJS Web Development E-commerce
HTML5 Web Development

Blogs HTML5 Web Development Introduction to HTML5 Web Development Content on the web is structured using HTML5. It added a number of improvements for easier use of multimedia, better accessibility and general performance. Websites that look good and are interactive are often built using HTML5, CSS and JavaScript. Key Features of HTML5 Semantic Elements: Only HTML5 includes new tags like <header>, <footer>, <article>, <section>, <nav> and others which make web pages easier to read and rank in search engines. Multimedia Support: Easily add audio and video to the web using HTML5 tags and without the need for third-party plugins. Canvas Element: The <canvas> tag helps developers sketch graphics at the time they are needed with JavaScript, making it important for games, animations and interactive drawings. Geolocation API: Through HTML5, developers can learn where users are and make location-based products and services available. Local Storage: With HTML5’s local storage feature, developers can store information on the user’s computer, giving better results and granting temporary access to content without a connection. Form Controls and Input Types: Because of <input type=”date”>, <input type=”email”> and <input type=”range”> controls, validating forms and how user input is handled is much simpler. Why HTML5 is Important for Web Development Mobile-Friendly: HTML5 makes websites responsive to mobile devices which is useful since so many people use phones. The site can be viewed on any type of screen and adjusts accordingly. Cross-Browser Compatibility: Nearly all browsers support HTML5, so websites built with it do not require using Flash. All new browser versions support it, so websites using it work the same on any device. Performance Improvements: Thanks to HTML5, devices can store data locally, reuse already stored resources and control multimedia more efficiently for improved speed and performance. SEO and Accessibility: The way HTML5 is built helps SEO by making it simpler for search engines to understand website content. It helps people with disabilities better use the web. HTML5 Web Development Best Practices Responsive Web Design : Because HTML5 and CSS3 work together effortlessly, it allows for the building of Responsive Web Design layouts that fit all screen sizes. A website with responsive design appears great and is easy to use on desktops as well as mobile devices. Best Practices: Build your grid with percentages instead of setting the values in pixels. Make your styles adapt for devices of different sizes using media queries. Use viewport meta tags to set how your website displays on mobile devices. Mobile-First Development : It makes sense with HTML5 to build mobile versions of websites first, before moving on to desktops. Resizing your web pages from their smaller forms and up will result in an even experience on all platforms. Best Practices: Have your site work smoothly for mobile devices and then improve it for desktops and other bigger screens. Design your website with clear buttons and a navigation system that responds well to touch. Accessibility Considerations :Creating sites that are accessible is easier with HTML5’s well-designed structure. Using semantic tags right supports the efforts of viewers using assistive devices and programs. Best Practices: Use ARIA (Accessible Rich Internet Applications) attributes to share more details with aid software meant for people with disabilities. Provide a way for users to interact using just their keyboard. Include alternative text for your images by using alt. HTML5 APIs and Libraries Besides HTML5, developers have access to various APIs and libraries that improve their website development. We will take a look at a few key APIs now. Canvas API : The canvas API element helps users to create graphics. Through JavaScript, developers have the ability to design animations, games and complicated graphics all within the browser. Example Use Cases: Game development Data visualizations (charts, graphs) Interactive maps Geolocation API : With the help of HTML5’s Geolocation API, websites can easily ask for your location and use this information in applications that use location features. Example Use Cases: Maps and navigation Local search results Weather applications Web Storage API : HTML5 offers Web Storage API and provides storage options called localStorage and sessionStorage. Because of this, websites are able to store information locally, boost performance and work even when you’re without a connection. Example Use Cases: Storing data so you can access it when you don’t have an internet connection Storing what users want Managing sessions in application development HTML5 and SEO (Search Engine Optimization) The structure of a webpage is better understood by search engines because of HTML5’s semantic elements. As a result, your site is more likely to be well ranked and indexed. Best Practices: Define various areas of your document by adding <article>, <header>, <footer> and <section> HTML5 tags. Give every image a detailed alt text and make sure search engines can read your audio and video content. Be sure to place significant metadata inside the <head> section of your HTML5 file. HTML5 Web Development Tools Many resources are available to simplify how you work with HTML5. Text Editors and IDEs Sublime Text By using Visual Studio Code Atom Brackets Frameworks Bootstrap is a framework that uses HTML, CSS and JavaScript to support the quick construction of responsive web sites. Foundation is a framework used to create websites and apps that respond well on different devices. HTML5 Validators : To verify your HTML5 code and see if it follows web standards, websites as the W3C Validator are available. Other Blogs Agile Software Development Agile Software Development Third-Party API Integration Third-Party API Integration Fintech App Development Fintech App Development Magento Website Development Magento Website Development React Native App Development React Native App Development Flutter App Development Flutter App Development iOS and Android App Development iOS and Android App Development ReactJS Web Development ReactJS Web Development E-commerce Website Development E-commerce Website Development Full-Stack Web Development Full-Stack Web Development Static or Dynamic Website Static or Dynamic Website Custom Website Development Custom Website Development UI/UX Design Company UI/UX Design Company Shopify for E-Commerce Development Shopify for
React Native Mobile App Development
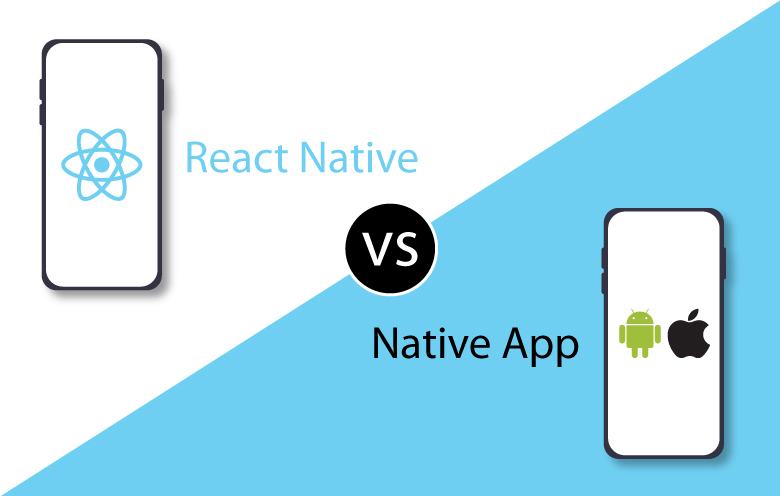
Blogs React Native App Development Introduction to React Native App Development Facebook (now Meta) developed React Native as a free-to-use framework for making applications that work on multiple platforms in JavaScript and React. Using Flutter lets developers write one code that can be used on iOS and Android without problems. With its use of native components, React Native supports making apps that feel almost native for users and lets code be used multiple times. Since it started in 2015, React Native has seen fast growth thanks to how flexible, quick and useful it is for making UI-centric mobile applications. According to sources, Facebook, Instagram, Airbnb and Tesla are among the recognized companies that have built their mobile apps using React Native. Why Choose React Native for App Development? Cross-Platform Development : React Native is useful because it supports app development for both iOS and Android. It’s possible to write JavaScript once and run it on both Android and iOS devices. Doing this helps save both time and resources by not having to build an app separately for every platform. Native Performance : Though traditional hybrid systems revolve around WebViews, React Native’s strength is producing native components that yield standard app performance. To interact with the camera, GPS and similar features, Flutter uses the native APIs, making the app bestow strong and smooth animation effects. Fast Development with Hot Reloading : Developers don’t have to restart the app to see their updates thanks to Hot Reloading in React Native. As a result, developing the app becomes much faster and experimenting with UI and its features is easier. Rich Ecosystem and Libraries : React Native has a wide range of libraries and plugins that developers can simply add to their apps. Because of React Native’s libraries, you can find solutions for most required features which means you don’t have to develop everything from scratch. Large Community and Support : A lot of developers use and help each other on the active React Native community. Young programmers help improve the framework, build reusable components, support others and offer new updates. Backed by Meta and ongoing updates, React Native stays at the top among mobile development tools. Key Features of React Native Cross-Platform Development : One important thing is that a single codebase can be used on both Android and iOS which lessens the time and money it often takes to create an app. Native Components : It is thanks to React Native’s use of native components such as buttons and text inputs, that the app feels native to mobile users. JavaScript and React : For React Native, JavaScript (the world’s leading programming language) and React—a leading JavaScript UI library—are part of the project.Developers can code applications using tools they already understand and since React follows these best practices, making the user interface is smooth and segmented. Hot Reloading : With React Native’s Hot Reloading, anyone making changes won’t need to restart the application. Because of this, debugging and improving the code is easier while you are developing. Access to Native Features : Programmers can take benefit of native APIs and use cameras, get location data, control sensors, schedule notifications and more. Customizable UI : With React Native, you can create UIs that fit your requirements. You can use React Native in combination with native code to design your app how you want. Performance Optimization : You can optimize your React Native application by using Swift, Objective-C for iOS or Java/Kotlin for Android, if needed.Thanks to this, problems that stop performance from improving are sorted out. The React Native Development Process Planning and Requirements Gathering : The initial stage in making a React Native app involves figuring out its purpose, the group it’s for and the key features. After studying these demands, the development team selects suitable tools and sets the boundaries of the project. Setting Up the Development Environment : You first have to set up the development environment to use React Native: To use React Native, first set up Node.js, as it manages grouped packages and runs the required build tools. Collectively, React Native helps you to initialize, build and test your software. You can use Visual Studio Code, Atom, or any other text editor, but it is important to have support for JavaScript and React syntax. You need to set up Android Studio which is for Android and Xcode which is for iOS, to create apps with these platforms. UI/UX Design : UI/UX design is very important when creating a mobile app. You can easily make flexible user interfaces with React Native by styling its components using a CSS-like language. Most people rely on Sketch, Figma or Adobe XD to develop basic design prototypes. With React Native, the interface is designed using components so that each bit of the interface (buttons, text fields and so on) can be used again. Using React Native makes sure that apps are perfect on every screen, small or large. App Development : Developers check the designs and start writing the actual code after that. The structures of React Native applications are composed of reusable elements (such as buttons and lists). They are built with JavaScript and can be used and adjusted in different sections throughout the application. The way an app is managed is crucial to its usefulness. For proper handling and storing states in React Native, you have Redux, Context API and MobX. Switching between screens is done using libraries called React Navigation or React Native Navigation. Testing : Testing is crucial to ensure the app is functional and bug-free. React Native supports unit tests, integration tests, and UI tests. Popular tools include: For unit testing, snapshot testing and most testing of React. Here, mobile devices are used for real device testing. A program that runs test automation on different systems. Debugging : React Native makes debugging simple by working hand in hand with React Developer Tools, Chrome DevTools and React Native Debugger. They enable developers to view app status, observe API calls and make the
Flutter App Development

Blogs Flutter App Development Introduction to Flutter App Development Flutter is a powerful, free, open-source UI framework made by Google. With Flutter, programmers can build apps that work on mobile, web and desktop from the same source code. Flutter has caught the attention of developers since 2017 because it helps build apps that look great and work smoothly. The programming language in Flutter, Dart, is made by Google as well. Flutter’s ability to instantly display any updates1 developers make is a key reason it speeds up the programming process. Why Choose Flutter for App Development? Cross-Platform Compatibility : Flutter is highly valued in app development because it can create apps that work on different platforms. Flutter makes it possible for developers to develop apps that will run on Android and iOS from a single codebase. There is no need to update and maintain two codebases for different platforms which can both take a long time and be expensive. Beautiful UI with Widgets : Using the many Widgets provided by Flutter helps you easily create eye-catching UIs. Widgets react well to changes and are able to meet the app’s specific needs. On Android, Material Design helps apps blend with the platform, while on iOS, Cupertino widgets do the same with the help of Cupertino widgets. High Performance : Because of Flutter’s native compilation, its apps can handle complex actions easily without web views or bridging technology. Thanks to this, apps that use Flutter offer a smooth system, rapid loading of content and experience no delays while using the app. Hot Reload : Enjoying real-time changes in your project is made easy by Flutter’s hot reload tool. Code changes are instantly viewed by the developer in the emulator or on their device. Thanks to this feature, building, debugging and improving the app can all be done much faster. Growing Community and Support : Flutter is gaining strong support from a community that grows larger each day. Google provides continual updates and back-up, so developers can make use of a large library of plugins for extra features. Key Features of Flutter Fast Development: The hot reload function ensures developers can quickly test and fix bugs, so development happens fast. Expressive and Flexible UI: Ater-built and customizable widgets plus extensive library, lets developers create eye-catching interfaces. Native Performance: Choosing Flutter, you can expect the app to work as fast as those built using native APIs. Single Codebase for Multiple Platforms: One important advantage is that you can develop in one codebase and release your app on both platforms. Dart Language: The Dart programming language, despite being less familiar, is simple to pick up, current and suited for building Flutter apps. Strong Ecosystem: Many libraries and plugins in Flutter make it simple to add features like Firebase, find your location, use the camera and so on. The Flutter App Development Process 1. Planning and Research You should make sure your app’s requirements, who it is for and what it will include are clearly set before you start development. Reviewing competitors and what the market requires will support the development of a product liked by users. 2. Setting Up the Development Environment Before starting Flutter development, you have to prepare your development environment. This involves: Installing Flutter SDK: Grab and set up Flutter SDK by going to its main website. Installing IDE: Flutter can be installed in many IDEs, but Android Studio and Visual Studio Code are by far the biggest favorites. Setting up Emulator/Device: You need to ensure an emulator is installed for Android or iOS or else get a physical device linked for testing. 3. App Design and UI/UX One of Flutter’s strengths is how easy it is to create attractive user interfaces. Then, the design of the app’s user interface should be focused on seamless, fast and easy use. UI/UX must be centered around how simple and user-engaging the design is. Wireframing: Wireframing helps you begin by planning the layout for the app. Prototyping: By using Figma or Adobe XD, make interactive prototypes that show the app’s working. 4. Development After the design is complete, work on development starts. It is here that you will: Write Code: Because Flutter uses widgets in a reactive style, everything you see on the screen is a widget (such as buttons, images, text and so on). State Management: You need good state management in Flutter to ensure your apps work smoothly. We can organize our state using the Provider, Riverpod or Bloc approaches. Integrate APIs and Third-Party Services: Most apps depend on APIs for things like getting data, positive user identification and processing payments. Flutter makes it possible for developers to include third-party libraries and services. 5. Testing Testing is an essential phase to ensure the app is free from bugs and runs smoothly. Flutter provides built-in testing libraries for unit, widget, and integration testing. Unit Testing: Tests individual functions and logic. Widget Testing: Tests the individual UI components. Integration Testing: Tests the app as a whole to ensure that all parts are working together correctly. 6. Debugging and Optimization As soon as your app is completed and tested, you should move on to the stages of debugging and optimization. Check the performance of your app using Flutter’s DevTools and use them to look for memory problems and any glitches. 7. Deployment and Maintenance If the version you tested is successful, then it’s time to put the app into use. For Android, post your app on Google Play and for iOS, upload it to Apple’s App Store. App Store Guidelines: You should pay attention to and follow each app store’s steps and policies. Ongoing Maintenance: After the app is deployed, you should keep watching it, resolve difficulties and issue updates whenever needed. Benefits of Using Flutter for App Development Reduced Development Costs : When you have a single codebase, it’s much cheaper and faster to develop than having many codebases. Flutter lets developers release their applications to iOS and Android at the same time which means
iOS and Android app development

Blogs iOS and Android App Development Introduction to iOS and Android App Development Because most people use their phones for almost everything, app development is now vital to the digital world. Mobile operating systems are mainly controlled by iOS (Apple) and Android (Google). Every framework draws from its own toolset, programming languages and frameworks for development. In this guide, we’ll study the main aspects of iOS and Android app development and compare their most important features, technology and tools. Key Differences Between iOS and Android It’s necessary to know the main differences between iOS and Android before starting development. iOS (Apple) The iOS operating system is used on Apple gadgets such as iPhones, iPads and iPods. In the past, Objective-C was used to develop iOS apps. Even so, Swift is today’s preferred language for iOS app development, although Objective-C is still accepted. All iOS apps are available only through the App Store for iOS. The development tool used for iOS apps is Xcode which comes from Apple itself. Most iOS apps are famous for looking the same and having a clean, polished UI that matches Apple’s rules for design. Android (Google) Android is built to run on many different models made by Samsung, Google Pixel, Huawei and other device makers. For a long time, Android development has mainly been done using Java. In addition, Kotlin is becoming increasingly used because of its clear code and trendy features. Android apps are usually found on the Google Play Store, but separate third-party stores also offer them. You need Android Studio, the official IDE for Android, to develop any Android app. Android lets developers adapt the user experience according to the device and screen size used, something iOS doesn’t. Tools & Technologies for App Development You need to learn certain tools and programming languages to use both of these platforms. Let’s look at the key tools developers rely on for iOS and Android app development: For iOS App Development Xcode: Xcode is the main IDE you can use for iOS development to create, test and submit apps to the App Store. Interface Builder allows designers to create user interfaces using a visual system. The simulator is an emulator for developers to try out their apps on many kinds of iOS devices. iOS applications are written in the languages known as Swift & Objective-C. Helps developers make iOS apps by giving them needed tools and useful features for app development. For Android App Development Android Studio: Official IDE for Android development Gradle is the tool used to compose Android applications. Though Kotlin is the main language for making Android apps, Java remains a widespread alternative. The Android SDK comes with all you need to construct Android apps. Android Studio’s emulator allows you to test your apps on several Android devices. App Development Process Though the process of developing an app is common for both platforms, they both have different tools and implications. iOS App Development Process Project Setup: Set up a new Xcode project, choosing the correct template (e.g., single-view, tab bar, etc.). Design the UI: Design the app’s user interface using Interface Builder, keeping in mind the Human Interface Guidelines (HIG) laid out by Apple. Writing Code: Develop Swift (or Objective-C) code in order to put into effect app features and business logic. Testing: Test the application on multiple devices and simulators through Xcode’s test tools. Debugging: Use debugging tools of Xcode to correct errors. App Store Submission: Upon extensive testing, the application is submitted to Apple App Store through App Store Connect. Android App Development Process Project Setup: Open Android Studio and start a new project by choosing the suitable template (e.g., empty activity, navigation drawer). Design the UI: Utilize XML layouts or Jetpack Compose (for new declarative UI) to create the user interface. Writing Code: Use app functionality in Kotlin (or Java) to execute business logic. Testing: Test on actual devices or employ Android Studio’s simulator to test various Android devices. Debugging: Use the debugging features of Android Studio to recognize and resolve problems. Play Store Submission: Once the app is extensively tested, it is published in the Google Play Store through the Google Play Console. Frameworks & Libraries for Mobile App Development Both iOS and Android development have various frameworks and libraries to accelerate the development process. iOS Frameworks UIKit: The core framework for creating graphical user interfaces. SwiftUI: A new declarative UI framework provided by Apple designed to make UI design and code simpler. Core Data: A data management and persistence framework. Core Animation: For dealing with animations and dynamic graphics. ARKit: For augmented reality applications. Android Frameworks Jetpack: A set of libraries to assist developers with best practices and minimizing boilerplate code. Some of the important Jetpack components are LiveData, ViewModel, and Room. Retrofit: A widely used library for managing API requests. Glide/Picasso: Libraries for managing image loading and caching. Room: An abstraction layer for local database management. ARCore: Google’s SDK for augmented reality (AR) apps. Cross-Platform Development For app developers who want to develop apps for iOS and Android without having to hold two different codebases, cross-platform frameworks provide an answer. They enable you to write one codebase and run it on both platforms. Popular Cross-Platform Frameworks Flutter: A UI toolkit developed by Google for creating natively compiled applications for the mobile, web, and desktop from a shared codebase. React Native: A Facebook-developed framework that enables you to create mobile apps with JavaScript and React. Xamarin: A framework supported by Microsoft that employs C# to create cross-platform applications. Ionic: A web-first framework that creates hybrid applications with web technologies (HTML, CSS, JavaScript). App Testing Testing is an important process in mobile app development to ensure that the application is free of bugs and works well on various devices. Following is how the testing is done on both platforms: iOS App Testing Unit Testing: Xcode supports unit tests natively through XCTest. UI Testing: UI Testing in Xcode permits developers to simulate user interaction with the app for testing its functionality. Performance Testing: Xcode provides instruments to monitor and improve the performance of apps, such as memory consumption and CPU usage. Android App Testing JUnit: Android employs JUnit for unit testing. Espresso: A test framework for Android’s UI testing. UI Automator: Another test tool for interacting with various apps while testing. Firebase Test Lab: A cloud-based testing service for apps by Google offering testing on different devices. Publishing the App After development and testing, the app is ready for release. The process of publishing on both platforms goes like this: Publishing on iOS (App Store) Developer Account: To make an app for the App Store, you must first pay $99 for the Apple Developer Program account. App Store Connect: With App Store Connect, add your app, arrange its details (such as the title, description and its price) and allow its review. App Review: Before it reaches the market, Apple checks the app to see if it follows their rules. Release: Once the approval is done, the app will go up on the App Store. Publishing on Android (Google Play Store) Developer Account: A Google Play Developer account is required and costs $25 (you pay this amount only once). Google Play Console: Upload your APK or AAB file, enter the details and submit it to be reviewed on Google Play Console. App Review: Google looks at the app to ensure it follows their policies. Release: As soon as it is approved, the app goes on the Google Play Store. Other Blogs Agile Software Development Agile Software Development Third-Party API Integration Third-Party API Integration Fintech App Development Fintech App Development HTML5 Web Development HTML5 Web Development
ReactJS web development services
Blogs ReactJS Web Development Why Choose Our ReactJS Web Development Services? State-of-the-Art Technology : One reason ReactJS is loved by so many is because it is developed and maintained by Facebook and delighted users with its superior speed, scalability and great flexibility. Using React as a JavaScript library, we can make applications that improve and grow without difficulty over the years. Fast & Responsive User Interface : Because of its virtual DOM, React can smooth out updates by rendering only the parts that require it. This makes the user interface experience rapid, smooth and responsive, suitable for current web apps. Component-Based Architecture : In ReactJS, we can split major user interface elements into tiny, usable pieces. Because it is modular, the development process becomes both more effective and easier to manage as your project gets bigger. The design allows each part to be independently modified, checked and improved, saving both time and money. SEO-Friendly : Keeping SEO in mind helps your website rank highly, so you get organic traffic. With ReactJS and SSR, your web projects are easier for search engines to find. Thanks to SSR, pages are pre-rendered, so both indexing and SEO improve greatly. Seamless User Experience : ReactJS makes it possible to give users a positive experience that includes smooth movement, instant content updates and quick reactions. No matter if it’s a simple SPA or a more advanced web app, React lets the user interface smoothly respond to user needs. Scalability & Flexibility : The applications we create with ReactJS are both scalable and maintainable. If your company grows, adjusting your application to include more features, integrate more systems and support more users is simple. Being flexible, React is used for making applications of all sizes, from the little projects to the biggest of them. Our ReactJS Web Development Process Project Discovery & Requirement Gathering : At the beginning, you need to learn about the business goals you want to achieve and the requirements for your project. With your input, we determine the goals, intended users and what you hope your product will feature and do. We ensure that what we present matches your organization’s principles and aspirations. UI/UX Design : In every successful web application, good user experience is very important. With intuitive design being our key priority, our team designs sites for an easy user experience on all devices. We team up with you to guarantee that the design fits your brand and helps users have a good experience. ReactJS Development : After the designs are done, our team starts work on the ReactJS application. We use standard systems in React to make components we can reuse and we make sure to take advantage of the newest React technologies to create apps that run smoothly. Integration of APIs & Backend Development : We make use of external APIs, background processing and databases to guarantee that your ReactJS web app is both operational and able to handle the scheduled business tasks. Integrating payment gateways, social media logins or data from the outside is possible with our help. Testing & Quality Assurance : Our talented QA team checks the application on all different devices and browsers to guarantee the highest level of performance. We scan the application to spot bugs, vulnerabilities and problems in performance so that it remains strong and dependable. Launch & Post-Launch Support : As soon as everything is set up, we launch your ReactJS web application. After your application is launched, our team will continue to give you updates, support with any issues and keep it updated. Key Features of ReactJS Web Development Fast Rendering: With virtual DOM, React makes web apps load faster and work better. Reusable Components: We can save time and avoid making components more than once by building reusable modules with React. Real-Time Data Updates: ReactJS is best at managing real-time updates, that’s why it’s suited for developing applications such as social networks and chats. Rich Ecosystem: Many tools and libraries are available through React’s ecosystem to boost your application’s features. Mobile App Development with React Native: If you’re trying to reach mobile users, we use React Native so your mobile apps are similar to the website, providing the same high-quality experience. Industries We Serve with ReactJS Web Development ReactJS web development services from our company are available for firms in different sectors. We have helped startups, small businesses and enterprises build web applications that get results. Our industries of specialization are: E-commerce: Develop websites and platforms that offer interactive e-commerce services and many features. Healthcare: Ensure that medical applications are both safe and capable of working well across a growing number of users. Finance & Banking: Design web apps for financial institutions with a main concern on safety and power. Education: Construct online learning spaces, develop e-learning courses and make educational tools. Social Networking: Make online spaces and websites so users can talk together in real time. Entertainment: Launch streaming platforms, create websites for games and add media applications. Why ReactJS is Perfect for Your Web Application Performance: Thanks to React’s efficient design, your web app will keep loading quickly even when content expands and your userbase grows larger. Flexibility: Working with React means you can blend it with many other tools and systems to meet your specific needs. Maintainability: Because of its component approach, the code is easier to maintain, needing less maintenance and decreasing possible technical problems. Strong Community Support:Because there is a big group of developers for ReactJS, updates, plugins and answers to various problems happen regularly. Technologies We Use with ReactJS We use the latest tools and best-known practices at our agency when building web apps with ReactJS. We also focus on using important technologies together with ReactJS. Node.js: When you need to build applications that run fast and can handle high traffic, use Node.js. Redux: Redux helps by making sure all components can communicate well with the app’s state. GraphQL: It helps with efficient data querying and stops you from gathering data
E-commerce Website Development

Blogs E-commerce Website Development E-commerce Website Development Services In today’s world full of internet competition, having a well-built and user-friendly e-commerce website is essential for your online success. Since more people are shopping online, it’s very important to have an organized and attractive online store that makes shopping hassle-free. Our team works to provide businesses of any size with services that create and run a website that helps bring in more sales and satisfied customers. Why Choose Our E-commerce Website Development Services? Customized Solutions for Your Business : Since every business is different, we offer custom solutions for you. We collaborate with you to tailor an e-commerce website to fit your brand, your goals and the people you want to attract. We design stores or marketplaces that meet your own requirements, no matter how simple or advanced you want them to be. Mobile-Friendly and Responsive Design : With most people using mobile devices, website design should fit all screens. A major part of all e-commerce activity is conducted through mobile gadgets. All of our e-commerce websites are built to respond to any screen perfectly, whether you’re using a smartphone, a tablet or a desktop. User-Centric Experience : We make sure your users can shop on your website quickly and without difficulty. Each part of the website is tailored to the user’s experience to ensure easy browsing and a fast checkout which helps us boost conversions and make our customers happy. Secure Payment Gateway Integration : Security is at the forefront when online transactions are handled by Payment Gateway Integration. We use reliable payment gateways that help protect your customers’ payments. We guarantee that making a transaction, regardless of which major provider, is always done under maximum security. SEO-Optimized for Better Visibility : You need customers to find your website for it to provide value. As part of our e-commerce development, we make sure your website appears high in search engine results. Our use of top on-page SEO techniques helps your site get found by more users and brings in more targeted visitors. Scalable and Flexible Solutions : A website that grows as your business grows is important. We design websites that are easy to expand, so handling new products, adding fresh features and integrating third-party programs will be simple. Our E-commerce Website Development Process Consultation & Requirements Gathering : To start, learning about your business needs is very important. With you, we make sure we know your design preferences, the features you need, available products and which payment integrations to include. Because of this, we are able to make certain we are focused on achieving your vision right away. Design & Development : Our designers look at what was learned and design wireframes and mockups that represent your brand.As soon as the design is approved, our development team starts creating a custom, fully running e-commerce website made with the latest tools. Payment Integration & Security Features : For security reasons, we connect with secure payment gateways, use SSL certificates and implement any further tools helping to secure customer information. Putting you in charge of protecting your activity is very important to us. Testing & Quality Assurance : Before you go live with your e-commerce site, we perform various checks to ensure it works well on all kinds of devices and web browsers. We check for software bugs, bad links and delays in loading to make sure the site runs perfectly. Launch & Post-Launch Support : After our testing is complete and the website meets all our standards, we help you take it live. Once your site launches, we continue to offer help, update the system and troubleshoot any issues to maintain it properly. Key Features of Our E-commerce Websites Product Catalog Management: With Sellerbase, you can easily arrange and present all your products, product categories and items. Order Management System: With an Order Management System, orders are processed quickly, followed and completed. Customer Account Management: Allow users to open accounts, store their details and view their previews order list. Advanced Search & Filter Options: With an easy-to-use search box and flexible filters, Advanced Search & Filter Options ensure customers get what they’re looking for. Wishlist & Cart Functionality: Make it possible for users to put products in their cart or wishlist so they have no trouble buying them in the future. Multi-Language & Multi-Currency Support: If your business serves an international customer group, we can add multi-language and multi-currency support. Customer Reviews & Ratings: Letting customers leave reviews and ratings of your products earns trust and makes other users more likely to choose them. Automated Email Marketing: You can keep in touch with your customers by emailing them automatically after they place an order, when you offer promotions and when they leave products in their cart. Technologies We Use We ensure your e-commerce store uses only the latest technology and platforms. The platforms we often collaborate with are: Shopify: Getting started on Shopify is simple and it works well for businesses of every size. WooCommerce: WooCommerce makes WordPress more flexible and customizable for its users. Magento: For high-volume businesses selling different types of products, Magento is the best fit. BigCommerce: BigCommerce is a high-performance service that gives enterprise users access to useful features. Custom Solutions: Another option is our custom e-commerce websites that use current programs like PHP, JavaScript, React and others. How E-commerce Website Development Drives Success for Your Business An e-commerce website is more than a digital shop; it can help you do much more. Reach a global audience: Your website allows people worldwide to access your products, letting you reach a global audience. Increase sales: A well-organized e-commerce site leads to more customers buying, making additional purchases and coming again. Enhance customer loyalty: When your site is easy to use and offers wishlists, tracking for orders and rewards, it leads customers to return. Collect valuable data: Monitor user activities, sales and how your inventory performs so you can decide on the right improvements for your business.